环境配置
语言:Python 3.6.1
IDE: Pycharm
浏览器:firefox
抓包工具:fiddler
爬虫框架:Scrapy 1.5.0
操作系统:Windows 10 家庭中文版
爬取前分析
分析登陆提交信息
分析登陆信息我使用的是fiddler,fiddler的使用方法就不作介绍了,大家可以自行搜索,首先我们打开github的登陆页面,输入用户名密码,提交查看fiddler获取的信息,我这里第一次故意输入错误的密码,结果入下:
登陆页面(https://github.com/login ) :
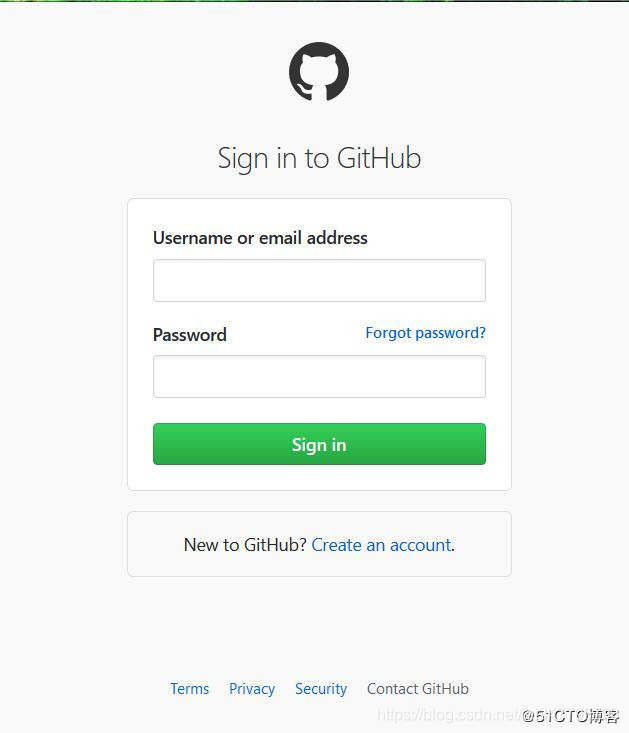
输入用户名和错误密码获取的fiddler结果:

这里我们用火狐开发者工具也可以看到form提交时会加入authenticity_token参数一起,如下图: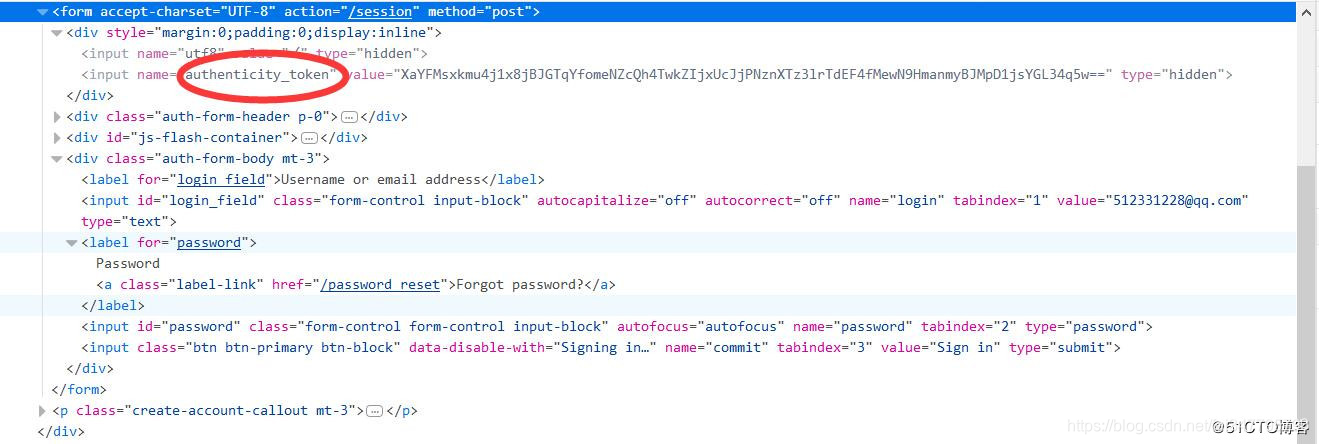
开始爬虫
创建项目
进入你要存储项目的文件夹中执行下面命令:
scrpy startproject githubspider
可以根据提示继续创建spider,也可以自己手动创建,使用下面命令:
cd githubspider
scrapy genspider example example.com
如下图:

项目内容如下: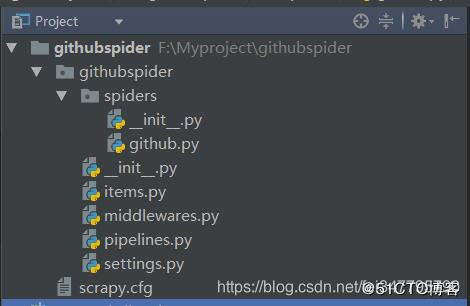
开始前准备
在scrapy.cfg同级目录下创建pycharm调试脚本run.py,内容如下:
# -*- coding: utf-8 -*-
from scrapy import cmdline

cmdline.execute('scrapy crawl github'.split())
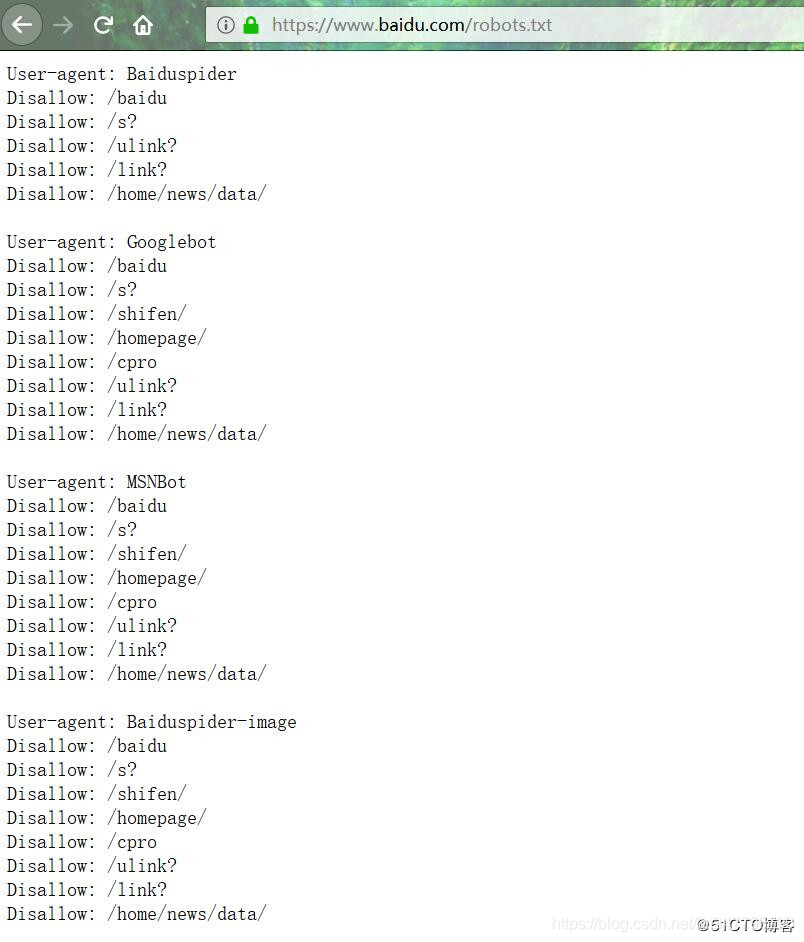
修改settings中的ROBOTSTXT_OBEY = True参数为False,因为默认为True,就是要遵守robots.txt 的规则, robots.txt 是遵循 Robot协议 的一个文件,它保存在网站的服务器中,它的作用是,告诉搜索引擎爬虫,本网站哪些目录下的网页不希望你进行爬取收录。在Scrapy启动后,会在第一时间访问网站的 robots.txt 文件,然后决定该网站的爬取范围。查看robots.txt可以直接网址后接robots.txt即可如百度:https://www.baidu.com/robots.txt
如果我们没有修改这个参数,则结果如下:
获取authenticity_token
首先要打开登陆页面,获取authenticity_token,代码如下:
import scrapy
from scrapy.http import Request
'''
更多Python学习资料以及源码教程资料,可以在群1136201545免费获取
'''
class GithubSpider(scrapy.Spider):
    name = 'github'
    allowed_domains = ['github.com']

    def start_requests(self):
        urls = ['https://github.com/login']
        for url in urls:
            # 重写start_requests方法,通过meta传入特殊key cookiejar,爬取url作为参数传给回调函数
            yield Request(url, meta={'cookiejar': 1}, callback=self.github_login)

    def github_login(self, response):
        # 首先获取authenticity_token,这里可以借助scrapy shell ”url“来获取页面
        # 然后从源码中获取到authenticity_token的值
        authenticity_token = response.xpath("//input[@name='authenticity_token']/@value").extract_first()
        # 利用scrapy内置logger打印info信息
        self.logger.info('authenticity_token=' + authenticity_token)
        pass
结果如下:

可以看到我们已经获取了authenticity_token的值,这一步重点要说明meta、cookiejar和logger。
meta:字典格式的元数据,可以传递给下一个函数meta官网解释;
cookiejar:是meta的一个特殊的key,通过cookiejar参数可以支持多个会话对某网站进行爬取,可以对cookie做标记,1,2,3,4…这样scrapy就维持了多个会话;
logger:scrapy为每个spider实例内置的日志记录器具体信息参考官网logging。
FormRequest
Scrapy提供了FormRequest类,是Request类的扩展,专门用来进行Form表单提交。我们主要使用FormRequest.from_response()方法来模拟简单登陆,通过FormRequest.from_response提交后,交给回调函数处理。代码如下:
     def github_login(self, response):
        # 首先获取authenticity_token,这里可以借助scrapy shell ”url“来获取页面
        # 然后从源码中获取到authenticity_token的值
        authenticity_token = response.xpath("//input[@name='authenticity_token']/@value").extract_first()
        self.logger.info('authenticity_token=' + authenticity_token)
        # url可以从fiddler抓取中获取,dont_click作用是如果是True,表单数据将被提交,而不需要单击任何元素。
        return FormRequest.from_response(response,
                                         url='https://github.com/session',
                                         meta={'cookiejar': response.meta['cookiejar']},
                                         headers=self.headers,
                                         formdata={'utf8': '✓',
                                                   'authenticity_token': authenticity_token,
                                                   'login': 'xxxxxx@qq.com',
                                                   'password': 'xxxxxx'},
                                         callback=self.github_after,
                                         dont_click=True,
                                         )
回调函数的代码如下:
    def github_after(self, response):
        # 获取登录页面主页中的字符串'Browse activity'
        list = response.xpath("//a[@class='tabnav-tab selected']/text()").extract()
        # 如果含有字符串,则打印日志说明登录成功
        if 'Browse activity' in list:
            self.logger.info('我已经登录成功了,这是我获取的关键字:Browse activity')
主页如下: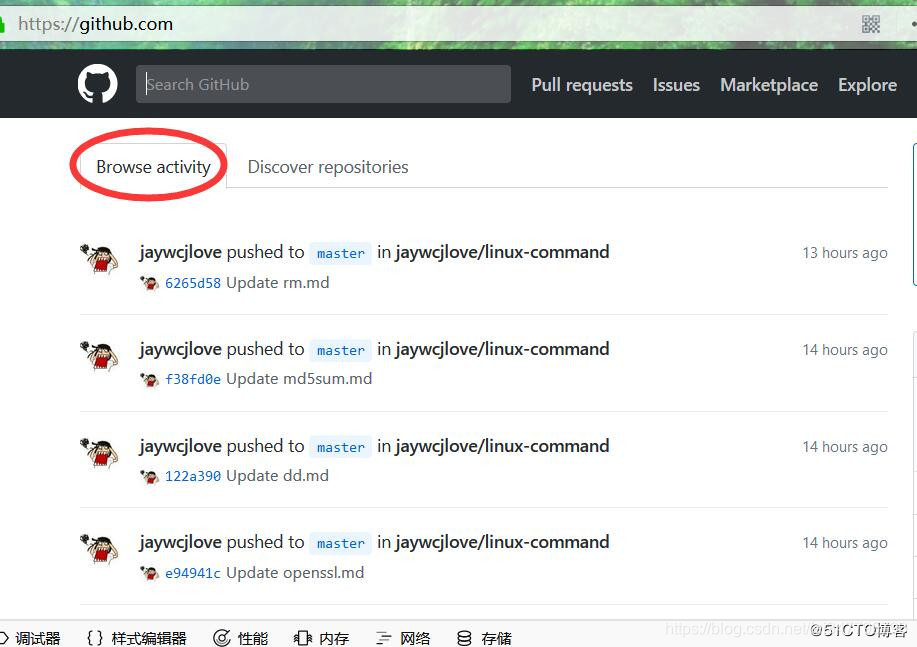
完整的github.py代码如下:
# -*- coding: utf-8 -*-
import scrapy
from scrapy.http import Request, FormRequest
'''
更多Python学习资料以及源码教程资料,可以在群1136201545免费获取
'''
class GithubSpider(scrapy.Spider):
    name = 'github'
    allowed_domains = ['github.com']
    # 头信息直接从fiddler中复制出来的
    headers = {
        'User-Agent': 'Mozilla/5.0 (Windows NT 10.0; Win64; x64; rv:58.0) Gecko/20100101 Firefox/58.0',
        'Accept': 'text/html,application/xhtml+xml,application/xml;q=0.9,*/*;q=0.8',
        'Accept-Language': 'zh-CN,zh;q=0.8,zh-TW;q=0.7,zh-HK;q=0.5,en-US;q=0.3,en;q=0.2',
        'Accept-Encoding': 'gzip, deflate, br',
        'Referer': 'https://github.com/',
        'Content-Type': 'application/x-www-form-urlencoded',
    }

    def start_requests(self):
        urls = ['https://github.com/login']
        for url in urls:
            # 重写start_requests方法,通过meta传入cookiejar特殊key,爬取url作为参数传给回调函数
            yield Request(url, meta={'cookiejar': 1}, callback=self.github_login)

    def github_login(self, response):
        # 首先获取authenticity_token,这里可以借助scrapy shell ”url“来获取页面
        # 然后从源码中获取到authenticity_token的值
        authenticity_token = response.xpath("//input[@name='authenticity_token']/@value").extract_first()
        self.logger.info('authenticity_token=' + authenticity_token)
        # url可以从fiddler抓取中获取,dont_click作用是如果是True,表单数据将被提交,而不需要单击任何元素。
        return FormRequest.from_response(response,
                                         url='https://github.com/session',
                                         meta={'cookiejar': response.meta['cookiejar']},
                                         headers=self.headers,
                                         formdata={'utf8': '✓',
                                                   'authenticity_token': authenticity_token,
                                                   # 这里是你自己的账号密码
                                                   'login': 'xxxxx@qq.com',
                                                   'password': 'xxxxxx'},
                                         callback=self.github_after,
                                         dont_click=True,
                                         )

    def github_after(self, response):
        # 获取登录页面主页中的字符串'Browse activity'
        list = response.xpath("//a[@class='tabnav-tab selected']/text()").extract()
        # 如果含有字符串,则打印日志说明登录成功
        if 'Browse activity' in list:
            self.logger.info('我已经登录成功了,这是我获取的关键字:Browse activity')
        else:
            self.logger.error('登录失败')
模拟登陆51cto
51cto的登陆和GitHub差不多,只不过获取的是csrf 而不是authenticity_token,用fiddler获取的结果如下: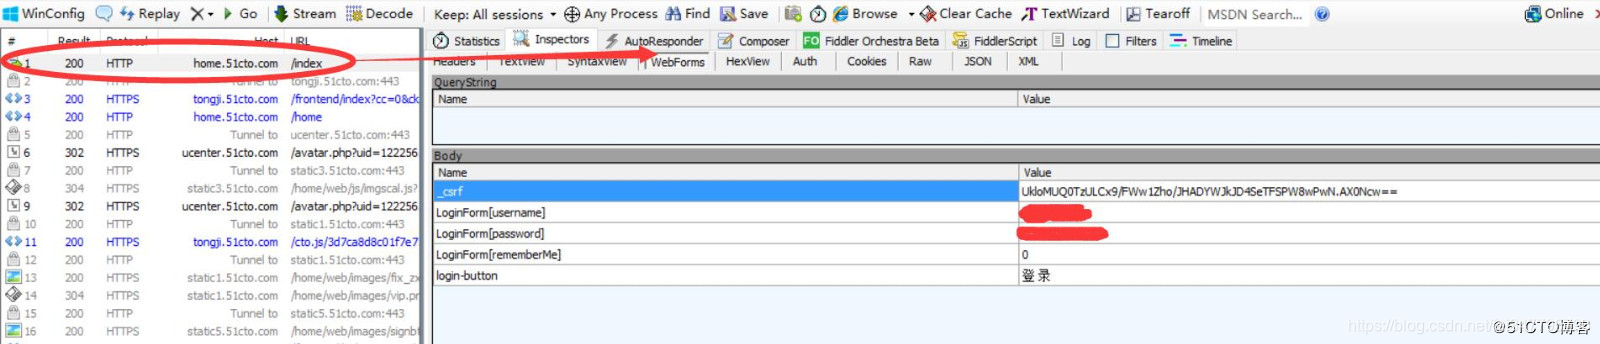
这里就不多说了,直接附代码,51cto.py(spider)内容如下:
import scrapy
from scrapy.http import FormRequest
from githubspider.items import CtospiderItem

class CtoSpider(scrapy.Spider):
    name = '51cto'
    allowed_domains = ['51cto.com']

    def start_requests(self):
        urls = ['http://home.51cto.com/index']
        for url in urls:
            yield scrapy.Request(url, callback=self.cto_login, meta={'cookiejar': 1})

    def cto_login(self, response):
        # 获取csrf值
        csrf = response.xpath("//input[@name='_csrf']/@value").extract_first()
        headers = {
            'User-Agent': 'Mozilla/5.0 (Windows NT 10.0; Win64; x64; rv:58.0) Gecko/20100101 Firefox/58.0',
            'Accept': 'text/html,application/xhtml+xml,application/xml;q=0.9,*/*;q=0.8',
            'Accept-Language': 'zh-CN,zh;q=0.8,zh-TW;q=0.7,zh-HK;q=0.5,en-US;q=0.3,en;q=0.2',
            'Accept-Encoding': 'gzip, deflate, br',
            'Referer': 'https://blog.51cto.com',
            'Content-Type': 'application/x-www-form-urlencoded',
        }
        # 此处为logger输出供调试时使用
        # self.logger.info("获取csrf值为 %s" % csrf)
        yield FormRequest.from_response(response,
                                        url='https://blog.51cto.com/linuxliu?type=1',
                                        headers=headers,
                                        meta={'cookiejar': response.meta['cookiejar']},
                                        formdata={
                                                  # 这个位置注意0要加引号,不然会报错,这个参数意思是是否记住密码10天内自动登录
                                                  'LoginForm[rememberMe]': '0',
                                                  'LoginForm[username]': 'xxxx',
                                                  'LoginForm[password]': 'xxxx',
                                                  '_csrf': csrf,
                                                  },
                                        callback=self.after_login,
                                        dont_click=True,
                                        )

    def after_login(self, response):
        # 定义item实例,items.py中已经定义好字段
        item = CtospiderItem()
        # 获取的网页内容
        resps = response.css("ul.artical-list li")
        for resp in resps:
            # 写入item字段中
            item['title_url'] = resp.css("a.tit::attr(href)").extract_first()
            item['title'] = resp.css("a.tit::text").extract_first().strip()
            # fullname的格式为“[名称](链接)”之所以这样是因为
            # markdown语法里这个表示链接的意思,点击名称直接打开链接内容
            item['fullname'] = '[' + item['title'] + ']' + '(' + item['title_url'] + ')'
            # 此处logger也是调试使用
            # self.logger.info("title url的值为:%s , title的值为%s" % (tit_url, tit))
            yield item

        # 下一页内容获取
        next_page = response.css('li.next a::attr(href)').extract_first()
        # self.logger.info("下一页链接为:%s" % next_page)
        if next_page is not None:
            yield scrapy.Request(next_page, callback=self.after_login)
items.py字段如下:
class CtospiderItem(scrapy.Item):
    # define the fields for your item here like:
    # name = scrapy.Field()
    title = scrapy.Field()
    title_url = scrapy.Field()
    fullname = scrapy.Field()
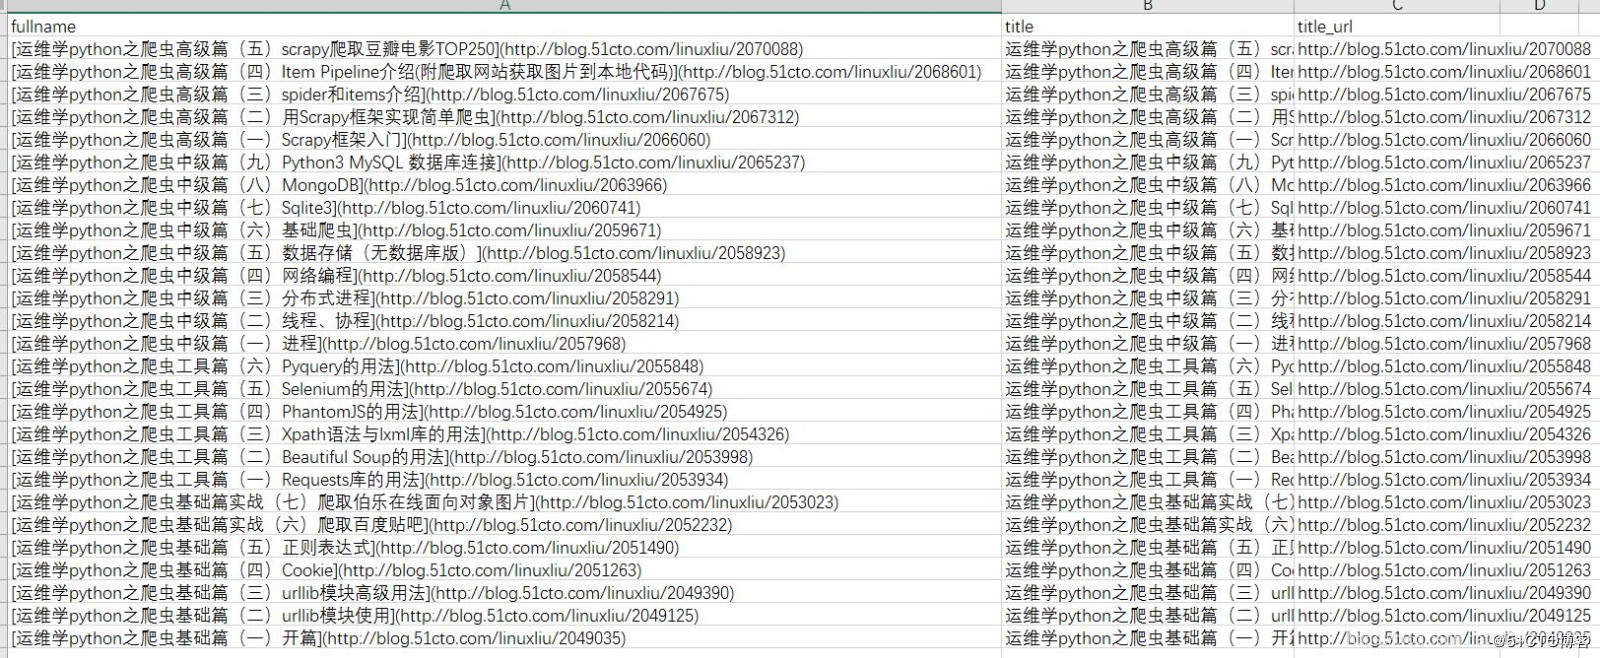
执行命令写入csv文件:
scrapy crawl 51cto -o cto.csv
文件结果如下: